¶ Workshop December 11, 2024 | Northern Meteorological Center
¶ CMU HPC ERAWAN System

¶ How to access the ERAWAN system
There are 2 ways to log in
- Secure Shell (SSH) via CMD, PowerShell, Terminal or other programs such as Xshell,MobaXterm, Termius, PuTTY
- Jupyter Notebook access on a web browser, specify the URL: https://erawan.cmu.ac.th:8000
Logging in must be within the Chiang Mai University network only or use CMU VPN.
¶ 1. How to access via Terminal
You can access via cmd or PowerShell
Format: ssh [account]@erawan.cmu.ac.th
Example: ssh cmmet01@erawan.cmu.ac.th
*If you are logging in for the first time, you will be asked for a fingerprint, answer yes
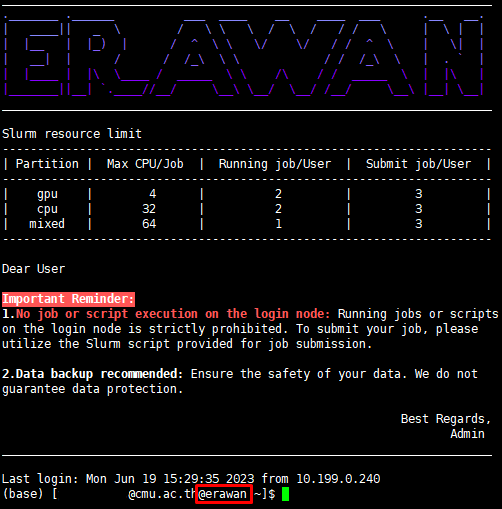
After entering the password correctly, you will enter the Erawan HPC system page as shown in the picture.
¶ 2. How to access via MobaXterm
MobaXterm can save the server settings we have configured, making it convenient for future use.

Remote host: erawan.cmu.ac.th
username: cmu account
¶ 3. Access via Termius (for MacOS) or via the machine's Terminal
Click New Host and the program will bring up a Setup window on the right.
Label: Enter any name
Address: erawan.cmu.ac.th
Group: Optional
Username & password: Enter CMU Account

¶ How to transfer files to the HPC Erawan system
¶ scp command
Command format
File : scp [file] [cmu account]@erawan.cmu.ac.th:/path/directory
$ scp "Multi boot nini Windows7.rar" sxxx.u@cmu.ac.th@erawan.cmu.ac.th:/home/pxxx.p

Folder : scp -r [./directory] [cmu account]@erawan.cmu.ac.th:/path/directory
$ scp -r ./folderName pxxx.p@cmu.ac.th@erawan.cmu.ac.th:/home/pxxx.p/folderName
Copy from server to Local : scp [cmu account]@erawan.cmu.ac.th:/path/directory [/local/directory]
$ scp pxxx.p@cmu.ac.th@erawan.cmu.ac.th:/home/pxxx.p/folderName ./folderName
¶ Program
You can use programs to transfer files to the server such as WinSCP, FileZilla, MobaXterm, Termius
¶ Basic Linux Command
| Command | Example | Description |
|---|---|---|
| ls | ls | List files and directories |
| pwd | pwd | Show current directory |
| mkdir | mkdir new_directory | Create a directory |
| cd | cd new_directory | Change directory |
| touch | touch file1 | Create a new file |
| cat | cat file1 | Display file content |
| cp | cp file1 file2 | Copy file |
| mv | mv file1 /home/name | Move or rename file |
| rm | rm file2 | Delete file |
| vi, vim, nano | vi file1 | Edit file with a text editor |
<> -- help Display help information
man <> Display the command's manual
¶ SLURM : Simple Linux Utility for Resource Management
It is a Job scheduler software responsible for job scheduling. The working principle of Slurm
- Users must submit a Job script through the Login node to queue in Slurm to wait to run the job.
- Slurm will send the job to run on the Compute node according to the Partition you specified in the Job script file.
- When the processing is finished, the results will be stored in the location where you ran it.

¶ Partition and Queue
- The CMU HPC ERAWAN system has the following Partitions for use
| Partition | Node | CPU | GPU | Time Limit | Max CPU/Job | Running Job/User | Submit Job/User |
|---|---|---|---|---|---|---|---|
| CPU | 2 | 192 | - | 168 hours | 32 | 2 | 3 |
| GPU | 2 | 64 | 16 | 168 hours | 4 | 2 | 3 |
| Mixed | 1 | 128 | 8 | 24 hours | 64 | 1 | 2 |
¶ Basic Slurm Commands
| Commands | Syntax | Description |
|---|---|---|
sinfo |
sinfo |
Command to view system resource information |
squeue |
squeue -u <user> |
Command to view the job queue |
scancel |
scancel <job-id> |
Command to cancel a job |
scontrol |
scontrol show job <job-id |
Command to display detailed job information |
scontrol show partition <patition> |
Command to display detailed partition information | |
srun |
srun <option> |
Command to run an interactive job |
sbatch |
sbatch <file slurm script> |
Command to submit a job |
¶ sinfo
sinfo
Output
PARTITION AVAIL  TIMELIMIT  STATE		NODESLIST  	CPU(A/I/O/T) 	MAX_CPUS_PER_NODE		GRES_USED
gpu*         up 7-00:00:00   mix			compute1		77/51/0/128								32				gpu:7
gpu*         up 7-00:00:00   mix			compute2		9/119/0/128								32				gpu:6
cpu          up 7-00:00:00   mix			compute1		77/51/0/128								96				gpu:7
cpu          up 7-00:00:00   mix			compute2		9/119/0/128								96				gpu:6
mixed        up 1-00:00:00	idle			compute3		0/128/0/128							 128				gpu:0
(*) default, if no partition is specified, the gpu partition will be used automatically.
PARTITION: Resource allocation schemes or groups of machines for different types of use <See details for ERAWAN>
AVAIL: Availability of the machine group
TIMELIMIT: Maximum time a job can run
STATE: Machine status
NODELIST: Machine name
CPU(A/I/O/T): Number of CPUs (Allocated/Idle/Other/Total)
MAX_CPUS_PER_NODE: Maximum number of CPUs
GRES_USED: Number of GPUs being used
Machine Status
| State | Description |
|---|---|
| idle | Machine is ready, no jobs are reserved |
| alloc | Machine is fully utilized, cannot be used to run jobs |
| mix | Machine is partially reserved, some parts are available for use |
| down | Machine is not available for use |
| drain | Machine is not available for use due to system problems |
¶ squeue
Syntax: squeue -u <user>
squeue -u pxxx.p
Output
JOBID PARTITION     NAME     USER ST       TIME  NODES NODELIST(REASON)
3649       gpu  dmso-20   user25  R 5-22:28:28      1 	compute1
3547   michael    c1-sa   user25  R 10-18:43:34     1 	compute1
JOBID: Job ID number
PARTITION: Resource allocation schemes or groups of machines for different types of use <See details for ERAWAN>
NAME: Job name
USER: User
ST: Job status
NODELIST: Machine name
(REASON): Reason why the job cannot be run
Job Status (ST)
| Status | Code | Description |
|---|---|---|
| RUNNING | R |
The job is currently allocated to a node and is running. |
| PENDING | PD |
The job is waiting for resource allocation. |
| FAILED | F |
The job could not be run. |
| COMPLETED | CD |
The job has completed successfully. |
| COMPLETING | CG |
The job is about to complete, but some processes are still running. |
Reason for not being able to run the job (REASON)
| Reason Code | Description |
|---|---|
Priority |
A higher priority job is in the queue waiting to run. Your job will run when those jobs are finished. |
Resources |
This job is waiting for necessary resources. It will start when the resources become available. |
QOSGrpCpuLimit |
All CPUs allocated for your job's QoS are in use. The job will run when a CPU becomes available. |
QOSGrpMaxJobsLimit |
The maximum number of jobs for your job's QoS has been reached. The job will run when another job finishes. |
QOSMaxJobsPerUserLimit |
The maximum number of jobs a user can run under the specified QoS has been reached. The job will run when another of the user's jobs finishes. |
¶ scancel
Syntax: scancel <job-id>
scancel 3700
You cannot cancel other users' jobs.
¶ scontrol
syntax: scontrol show job <job-id>
scontrol show job 3700
output
JobId=3700 JobName=M_xqc_L506_64
   UserId=user41(1059) GroupId=users(100) MCS_label=N/A
   Priority=4294901595 Nice=0 Account=training QOS=normal
   JobState=RUNNING Reason=None Dependency=(null)
   Requeue=1 Restarts=0 BatchFlag=1 Reboot=0 ExitCode=0:0
   RunTime=19:51:35 TimeLimit=1-00:00:00 TimeMin=N/A
   SubmitTime=2023-06-06T13:48:13 EligibleTime=2023-06-06T13:48:13
   AccrueTime=2023-06-06T13:48:13
   StartTime=2023-06-06T13:48:13 EndTime=2023-06-07T13:48:13 Deadline=N/A
   SuspendTime=None SecsPreSuspend=0 LastSchedEval=2023-06-06T13:48:13 Scheduler=Main
   Partition=short AllocNode:Sid=erawan:1763199
   ReqNodeList=(null) ExcNodeList=(null)
   NodeList=compute3
   BatchHost=compute3
   NumNodes=1 NumCPUs=64 NumTasks=64 CPUs/Task=1 ReqB:S:C:T=0:0:*:*
   TRES=cpu=64,node=1,billing=64
   Socks/Node=* NtasksPerN:B:S:C=0:0:*:1 CoreSpec=*
   MinCPUsNode=1 MinMemoryNode=1T MinTmpDiskNode=0
   Features=(null) DelayBoot=00:00:00
   OverSubscribe=OK Contiguous=0 Licenses=(null) Network=(null)
   Command=/home/user41/natthiti/job/MOF/xqc_L506_64/run_g16_Erawan_230605.sub
   WorkDir=/home/user41/natthiti/job/MOF/xqc_L506_64
   StdErr=/home/user41/natthiti/job/MOF/xqc_L506_64/slurm-3700.out
   StdIn=/dev/null
   StdOut=/home/user41/natthiti/job/MOF/xqc_L506_64/slurm-3700.out
   Power=
syntax: scontrol show partition <partition>
scontrol show partition cpu
output
PartitionName=cpu
   AllowGroups=ALL AllowAccounts=ALL AllowQos=ALL
   AllocNodes=ALL Default=NO QoS=cpu
   DefaultTime=NONE DisableRootJobs=NO ExclusiveUser=NO GraceTime=0 Hidden=NO
   MaxNodes=UNLIMITED MaxTime=7-00:00:00 MinNodes=0 LLN=NO MaxCPUsPerNode=96
   Nodes=compute[1-2]
   PriorityJobFactor=1 PriorityTier=1 RootOnly=NO ReqResv=NO OverSubscribe=NO
   OverTimeLimit=NONE PreemptMode=OFF
   State=UP TotalCPUs=256 TotalNodes=2 SelectTypeParameters=NONE
   JobDefaults=(null)
   DefMemPerNode=UNLIMITED MaxMemPerNode=UNLIMITED
   TRES=cpu=256,mem=4000000M,node=2,billing=256,gres/gpu=16
¶ srun
- For submitting a job
syntax:srun <option> <executable_path>
srun --partition=gpu --ntasks-per-node=2 --gres=gpu:1 python3 test.py
- For allocating an interactive job
syntax:srun <option> --pty bash
srun --partition=gpu --ntasks-per-node=2 --gres=gpu:1 --pty bash
option
| Full | Short |
|---|---|
--partition=name_partition |
-p name_partition |
--nodes=num_node |
-N num_node |
--ntasks=num_task |
-n num_task |
--ntasks-per-node=num_task |
|
--cpus-per-task=num_cores |
-c num_cores |
--mem=num_mem |
|
--time=hh:mm:ss |
-t hh:mm:ss |
--gres=gpu:num_gpu |
¶ sbatch
Syntax: sbatch <file slurm script>
$sbatch test.sh
Output
Submitted batch job <job-id>
¶ Sbatch (Submitting Job)
Commands for creating a Slurm bash script.
man sbatchorsbatch -helpor sbatch documentation
¶ Steps to Submit a Job
- Create a script file in the path where you want to run the job.
$ vi script.sh
- Specify the required resources and save the file.
#!/bin/bash

#SBATCH --job-name=test     		## Job name
#SBATCH --output=test_%j.out    ## Output file name (%j = Job-ID)
#SBATCH --error=test_%j.err   	## Error file name (%j = Job-ID)
#SBATCH --time=10:00          	## Time to run the job
#SBATCH --ntasks=1            	## Number of tasks to use
#SBATCH --cpus-per-task=1     	## Number of cores to use
#SBATCH --partition=cpu         ## Specify the partition to use


##module purge                    ## unload all modules because a module may have been loaded before
##module load anaconda3           ## load the required module, in this example, Anaconda

python --version           ## command to run the code
Note
- For jobs that use threads, set #SBATCH --cpus-per-task= to the number of threads used.
- For MPI jobs, set #SBATCH --ntasks= to the number of processes required.
- For jobs that mainly use GPU on the GPU partition, set #SBATCH --cpus-per-task appropriately. If the job does not split threads, set it to 1. If it splits threads, set it between 2-4 threads to share the remaining cores with other cards to fully utilize the system.
- Use the sbatch command followed by the bash script name to submit the job to SLURM.
$ sbatch script.sh
¶ Additional option details
¶ Job Name, Input, Output, Working Directory
| Sbatch option | Description |
|---|---|
-J, --job-name=<job_name> |
Assign a name to the job |
-o, --output=<filename_pattern> |
Output file %x : Job name %j : Job-ID %t : Task identifier. %N : Short hostname. |
-e, --error=<filename_pattern> |
Error file |
¶ Notifications
| Sbatch option | Description |
|---|---|
--mail-user=<email> |
Receive email notifications |
--mail-type=[TYPE\|ALL\|NONE] |
Email notification types: BEGIN, END, FAIL. --mail-type BEGIN, END, FAIL |
¶ Time Limits
| Sbatch option | Description |
|---|---|
--time=<time> |
Set the maximum time for the job to run |
-b, --begin=<time> |
Set the desired start time for job allocation |
¶ Memory Allocation
| Sbatch option | Description |
|---|---|
--mem=<size>[units] |
Specify the required memory per node |
--mem-per-cpu=<size>[units] |
Specify the required memory per CPU |
--mem-per-gpu=<size>[units] |
Specify the required memory per GPU |
¶ Nodes, Tasks, and CPUs
| Sbatch option | Description |
|---|---|
-n, --ntasks=<number> |
Number of tasks / processes |
-N, --nodes=<minnodes>[-maxnodes] |
Number of nodes |
--ntasks-per-node=<ntasks> |
Run ntasks per node |
-c, --cpus-per-task=<ncpus> |
Run ncpus per task / process |
-p, --partition=<partition_names> |
Specify the partition to use |
-w, --nodelist=<node_name_list> |
Specify the nodes to use |
¶ GPUs
| Sbatch option | Description |
|---|---|
--gpus=[type:]<number> |
Specify the total number of GPUs required for the job |
--gpus-per-node=[type:]<number> |
Specify the number of GPUs required for the job on each node |
¶ How to use Software on the HPC Erawan system
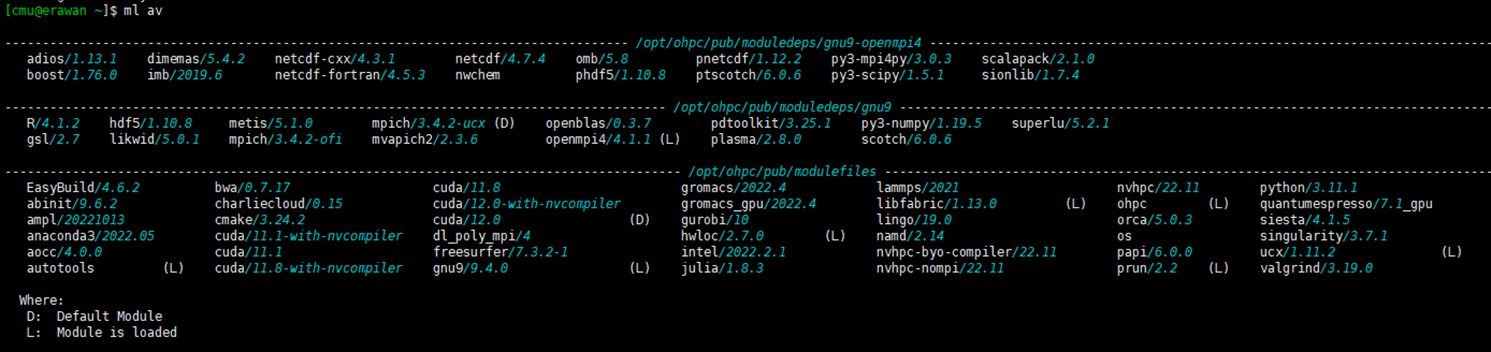
The HPC Erawan system has pre-installed programs. You can check the list of available programs with the command:
$ module avail
# or
$ ml av
¶ How to call a program
Command: module load [program_name]
$ module load anaconda3
¶ Check the called program
Command: module list or ml
$ module list

¶ How to cancel program usage
Command: module unload [program_name]
module unload anaconda3

You can install your own programs in your personal space (/home or /project) but the program must be licensed correctly.
¶ Resource Monitoring
In addition to the sinfo and squeue commands, there are commands for viewing the machine's resources and running processes.
There are 2 types of commands
- View CPU & Memory processes with the
htopcXcommand - View GPU processes with the
nvtopcXcommand
*Note: Replace X with the machine number (Erawan system has 3 machines, c1-c3)
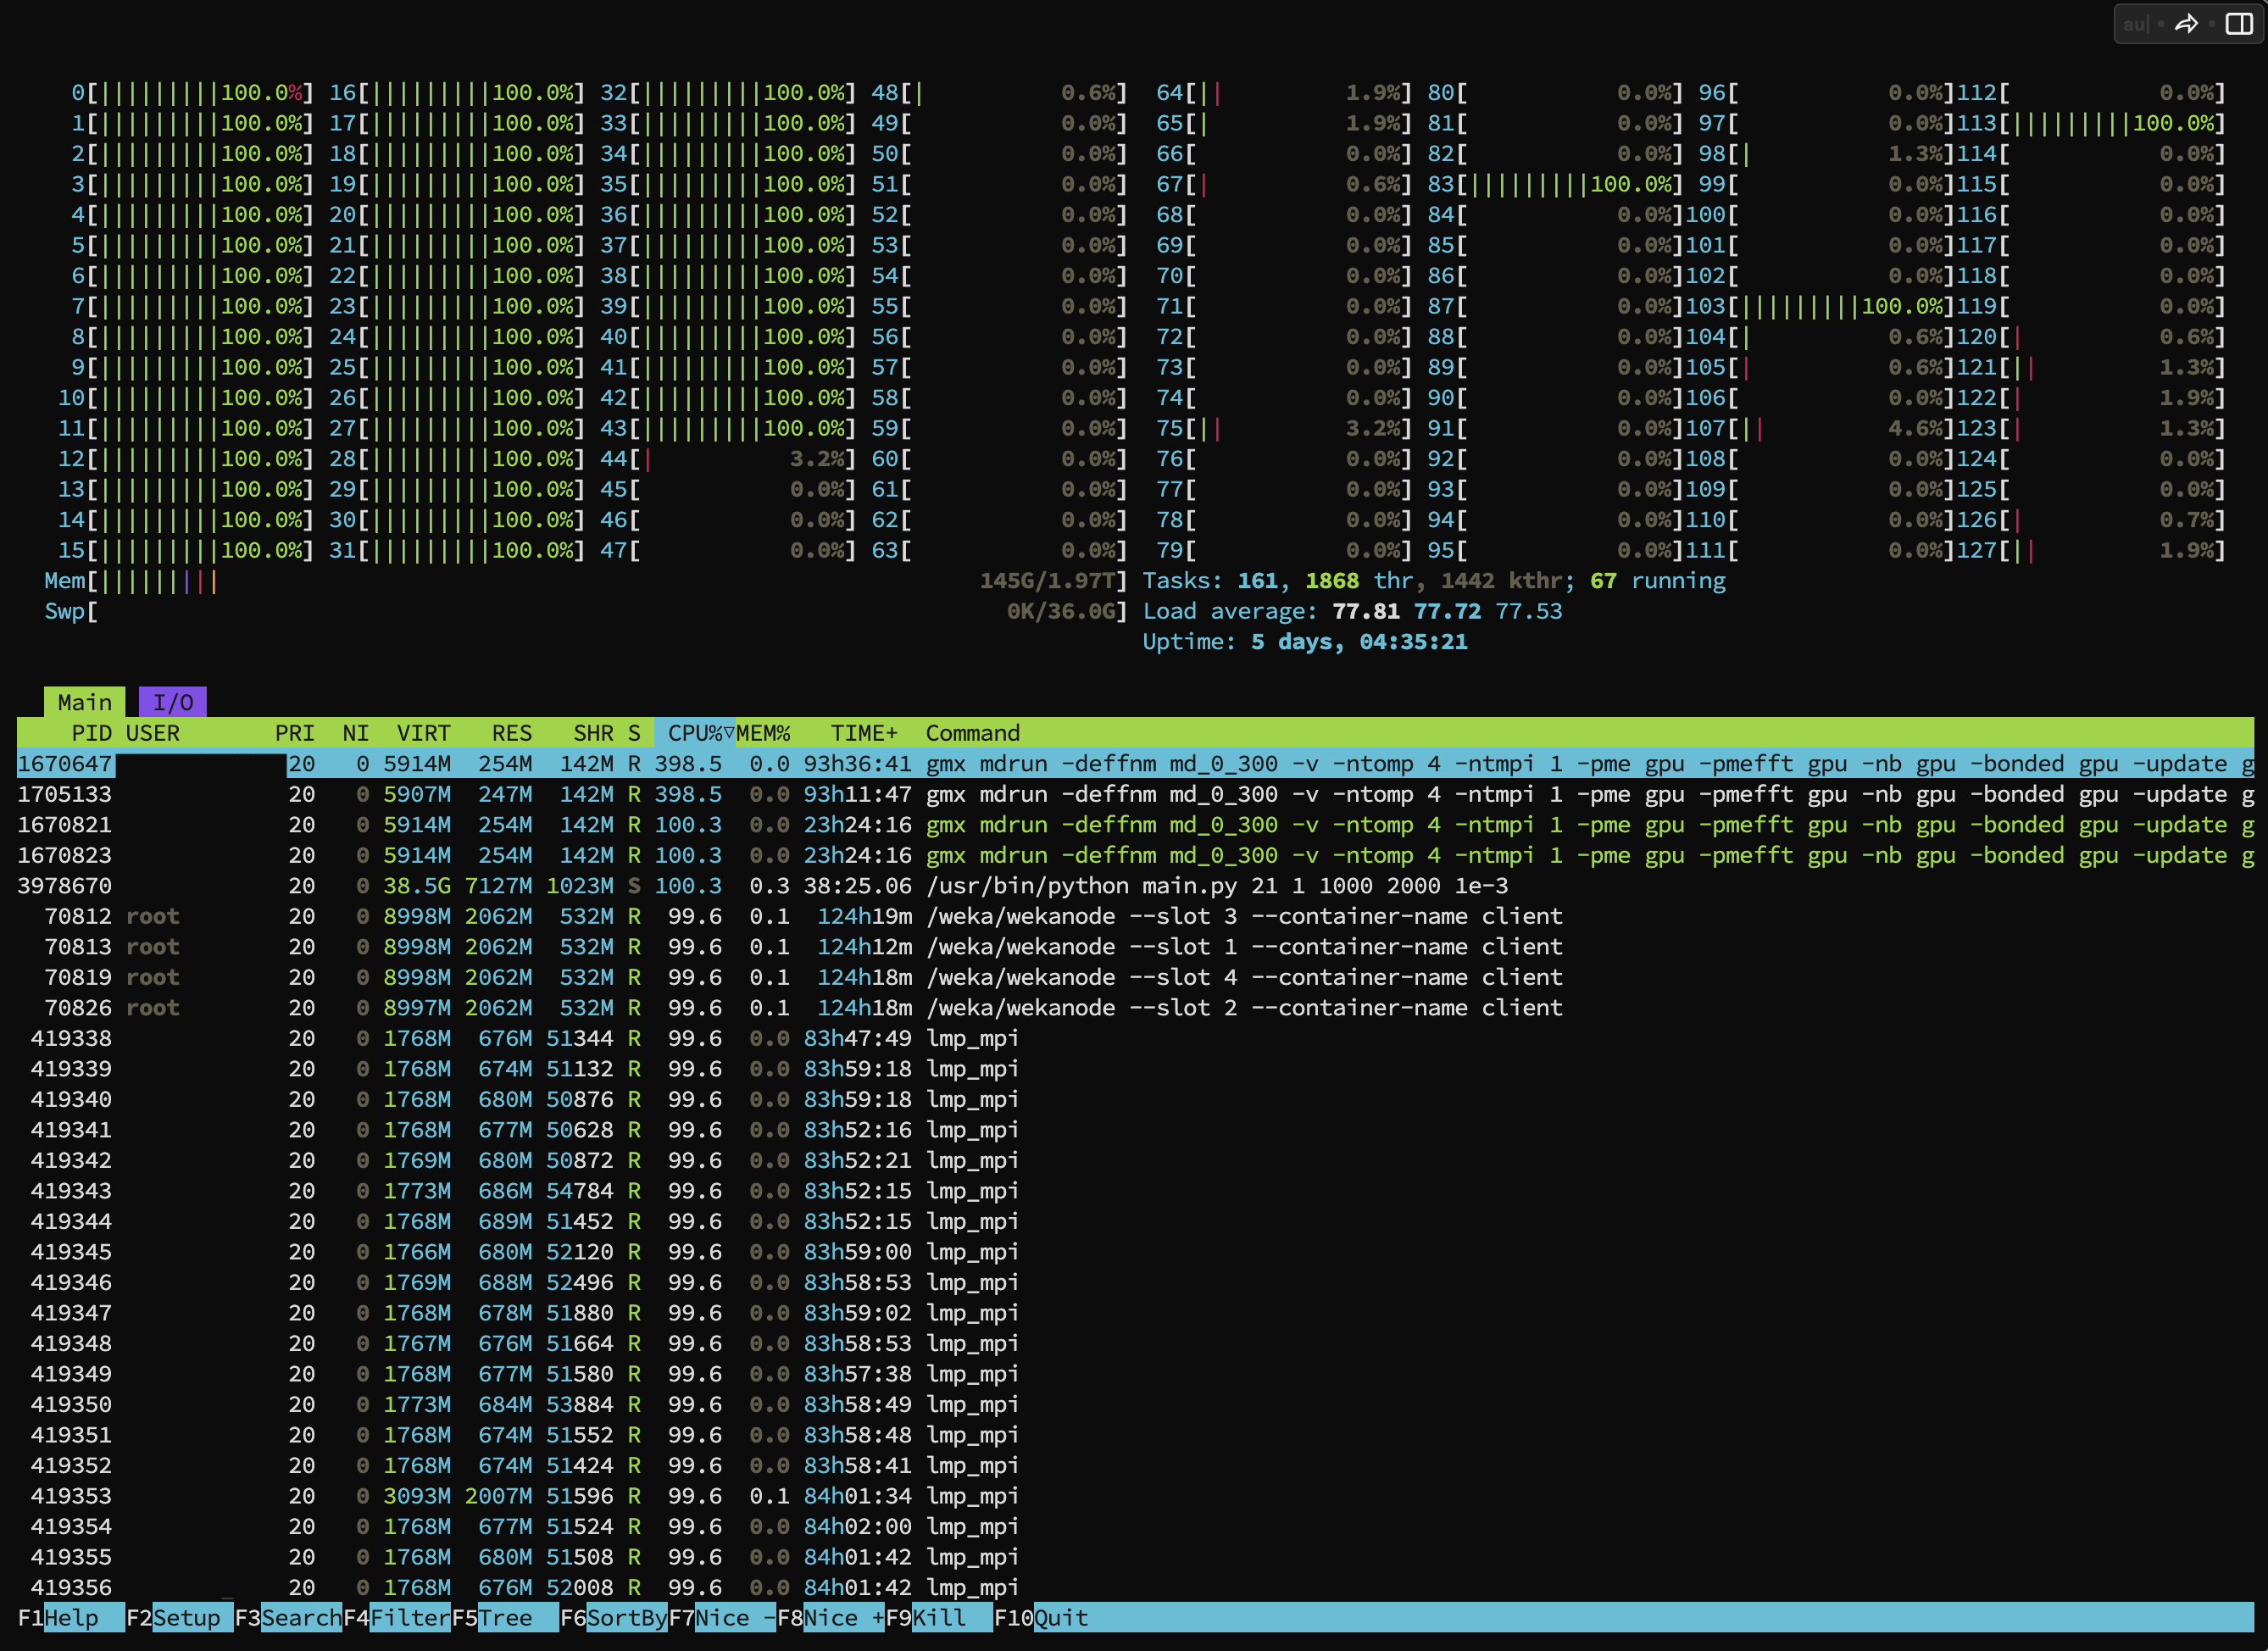
Example of using the command to view CPU & Memory usage
$ htopc1
Example of using the command to view GPU usage
You can see how much GPU your running job is using from the bottom bar.
$ nvtopc2

¶ Example
¶ 1. Create ENV
conda create -n testenv python=3.10		# Create env
conda activate testenv								# activate the env named testenv

----  Check version env  ----------------
python
exit()
----  End check version env  ------------

conda deactivate				# deactivate the env
----  Check version with out env --------
python
exit()
----  End check version with out env ----
1.1 Python file
mkdir ex1_env   				# Create a directory named ex1_env
cd ex1_env      				# change directory to ex1_env
touch checkversion.py  	# Create a file named checkversion.py
vim checkversion.py			# Edit the file named checkversion.py
checkversion.py file
import sys
print(sys.version)
To exit vim, press esc and then shift+: (Colon). A ":" will appear at the bottom left.
Then use the wq command to save and exit vim.
To exit without saving, use the q! command.
1.2 Slurm script
vim run.sh
#!/bin/bash
#SBATCH --job-name=E0
#SBATCH --partition=cpu
#SBATCH --output=%j.out
#SBATCH --error=%j.err

source $HOME/.bashrc
conda activate testenv

python3 checkversion.py
¶ 2. Check GPU Available in Pytorch
¶ srun (interactive)
mkdir ex2_Pytorch
cd ex2_Pytorch
Test RUN interactively with the command
srun -p gpu --gres=gpu:1 --cpus-per-task=1 --pty bash
python3

import torch
torch.cuda.device_count()
torch.cuda.is_available()
torch.cuda.get_device_name(0)
X_train = torch.FloatTensor([0., 1., 2.])
X_train = X_train.cuda()
print(X_train)
If it doesn't run or can't find the GPU
- check env, the account page must not show (base)
- if it shows (base), do conda deactivate
and conda config --set auto_activate_base False #set it to not auto activate the base environment
¶ sbatch
- Create a file to run python
vim runPytorch.py
import torch

print(torch.cuda.device_count())
print(torch.cuda.is_available())
print(torch.cuda.get_device_name(0))
X_train = torch.FloatTensor([0., 1., 2.])
X_train = X_train.cuda()
print(X_train)
- Create a bash script file in the path where you want to run the job, specifying the required resources.
vim run.slurm
#!/bin/bash

#SBATCH --job-name=E1
#SBATCH --output=%j.out
#SBATCH --error=%j.err
#SBATCH --cpus-per-task=1
#SBATCH --partition=gpu
#SBATCH --gpus=1

python3 runPytorch.py
**If an env is created, add the code to the slurm script before running **
source $HOME/.bashrc
conda activate testpytorch
- Use the sbatch command followed by the bash script name to submit the job to SLURM.
sbatch run.slurm
¶ Singularity
A container system used on HPC systems that works similarly to Docker.
Website sources
NGC which is a source of nvidia containers https://ngc.nvidia.com/catalog/containers
Docker hub a source of Docker containers https://hub.docker.com/
¶ Download
- Tensorflow
cd HPC_Workshop_9May/S2_Tensorflow
module load singularity
singularity pull tensorflow.sif docker://nvcr.io/nvidia/tensorflow:22.12-tf1-py3
vim test_tensorflow.py
test_tensorflow.py
import tensorflow as tf
# Check for GPU availability
if tf.config.list_physical_devices('GPU'):
   # Configure TensorFlow to use the first available GPU
   physical_devices = tf.config.list_physical_devices('GPU')
   tf.config.experimental.set_memory_growth(physical_devices[0], True)
   logical_devices = tf.config.list_logical_devices('GPU')
   print("Using GPU: {}".format(logical_devices[0]))
else:
   print("No GPU available, defaulting to CPU.")

# Define some sample data
x = tf.constant([[1., 2.], [3., 4.]], dtype=tf.float32)
y = tf.constant([[5., 6.], [7., 8.]], dtype=tf.float32)

# Perform matrix multiplication on GPU (if available)
with tf.device("/GPU:0" if tf.config.list_physical_devices('GPU')
  else "/CPU:0"): z = tf.matmul(x, y)

# Print the result
print(z.numpy())
vim run.sh
run.sh
#!/bin/bash

#SBATCH -J testTen
#SBATCH -o %j.out
#SBATCH -e test_%j.err
#SBATCH -c 1
#SBATCH -p gpu
#SBATCH --gpus=1

module purge
module load singularity

singularity run --nv /opt/ohpc/pub/apps/singularity/tensorflow_latest-gpu.sif python test_tensorflow.py

##singularity exec --nv tensorflow_23.sif  python tensorflow.py
¶ Running Jupyter Notebook via ssh tunneling
- Create
jupyter.sh
vim jupyter.sh
#!/bin/bash
#SBATCH --job-name=jupyter
#SBATCH --gpus=1
#SBATCH --time=02:00:00

cat /etc/hosts
port=$(shuf -i 6000-9999 -n 1)
jupyter lab --ip=0.0.0.0 --port=$port
The
$portport is to specify which port jupyterhub should run on.
You can set the number yourself, but make sure it is not a duplicate. Set it high because low port numbers might conflict with other services, especially those below 1024.
Or use the formula to use a portport=$(shuf -i 6000-9999 -n 1)
- Submit the job
sbatch jupyter.sh
- When the job is running (R), check the output to see which machine it is running on, along with the token in the slurm output.
- Create an ssh tunnel from the local machine to the port we assigned to Jupyter when submitting the job.
ssh -L 9999:10.98.4.1x:<port> <cmu account>@erawan.cmu.ac.th
- Open Jupyter Hub at http://localhost:9999
Example code
from tensorflow.python.client import device_lib
print(device_lib.list_local_devices())
Add the virtualenv as a jupyter kernel
conda activate [env-name]
ipython kernel install --user --name=[env-name]