¶ VNC Server
¶ Create Desktop
For initial access, set the login password first using the command
$ vncpasswd or $ vncserver
Set the desired password
Password:
Verify:
Would you like to enter a view-only password (y/n)?
If you want others to be able to view your session, press y and set a password. If you do not want this, press
n.
If you need to change the password for remote desktop access, use thevncpasswdcommand for the change.
You can use the GUI via the VNC protocol using the command
$ vncserver
Executing this command creates your session for remote access to the GUI desktop.
$ vncserver -list
This will display the sessions you have created.
TigerVNC server sessions:

X DISPLAY #     PROCESS ID
:99             2114640
:1              2135460
** Check this list every time before use to prevent the creation of unnecessary, multiple sessions.
¶ Deleting a Desktop
If you are finished using a session or wish to delete it, use the command
vncserver -kill :[เครื่องที่มีใน list]
Example
$ vncserver -kill :99
This will display the message
Killing Xvnc process ID 2114640
Check the remaining sessions
$ vncserver -list

TigerVNC server sessions:

X DISPLAY #     PROCESS ID
:1              2135460
¶ VNC Viewer
Once the Session is created, the next step is to remotely access the Login node
¶ Establishing the Connection
Open a new Local Terminal on your machine.
SSH Tunneling: ssh -L <port>:localhost:<vnc-port> user@remote_server
Example
$ ssh -L 9999:localhost:5901 sirapat.au@cmu.ac.th@erawan.cmu.ac.th
9999 is Local port
localhost is the Destination address, which in this case uses your own machine.
5901 is Destination port
5901 is the port obtained from the
vncserver -listabove.
Example
If the display is :2, the port to use is 5902.
If the display is :74, the port to use is 5974.
¶ Using Software to Access the Desktop
MacOS users can connect without dedicated software by navigating to Finder > Go > Connect to Server
Enter the Server Address =vnc://localhost:9999
Once connected successfully, access the created Desktop using the VNC Viewer by RealVNC® Download
![]()
- Enter Address:
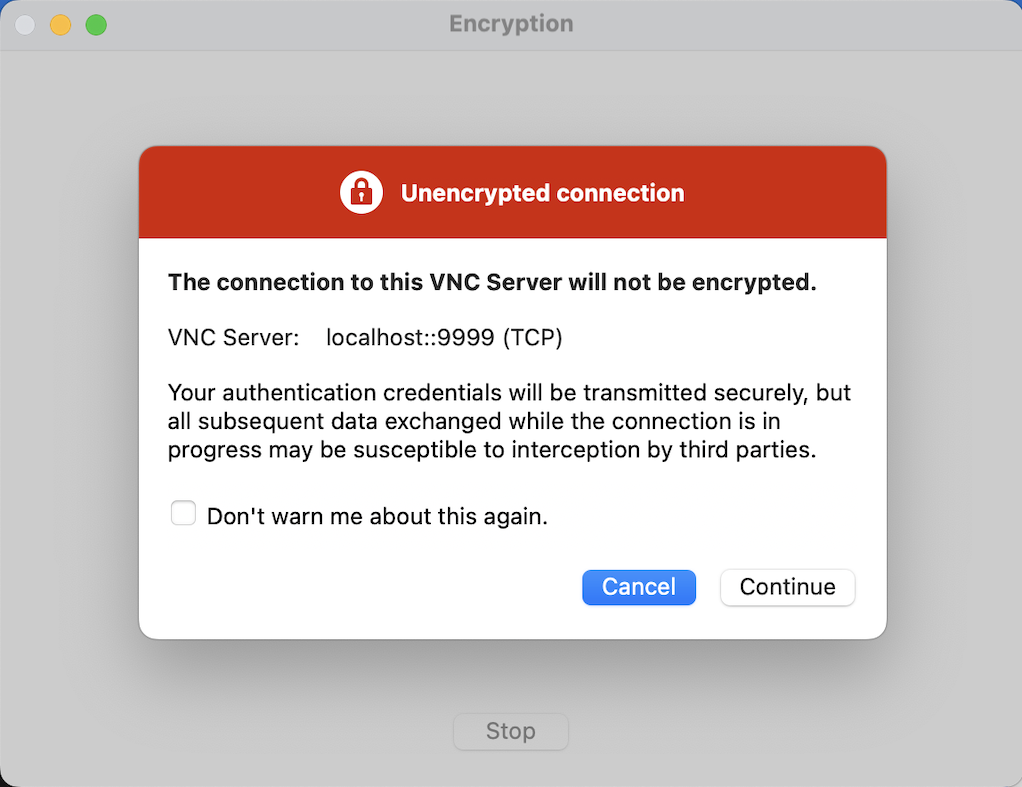
localhost:9999
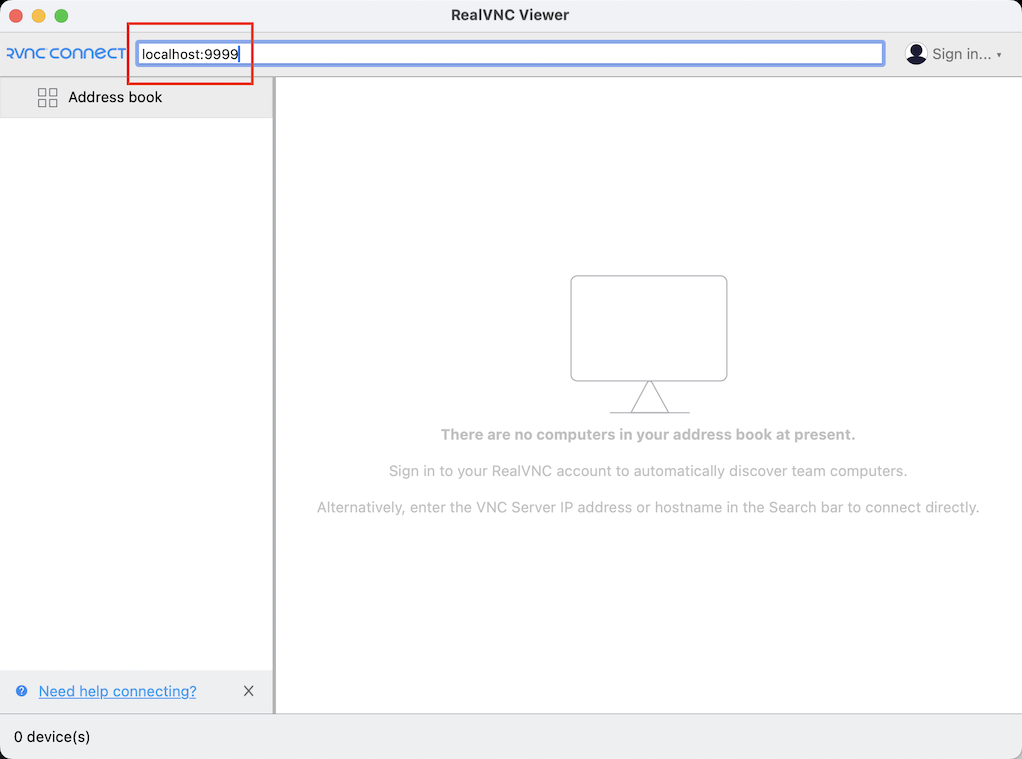
- Click Continue
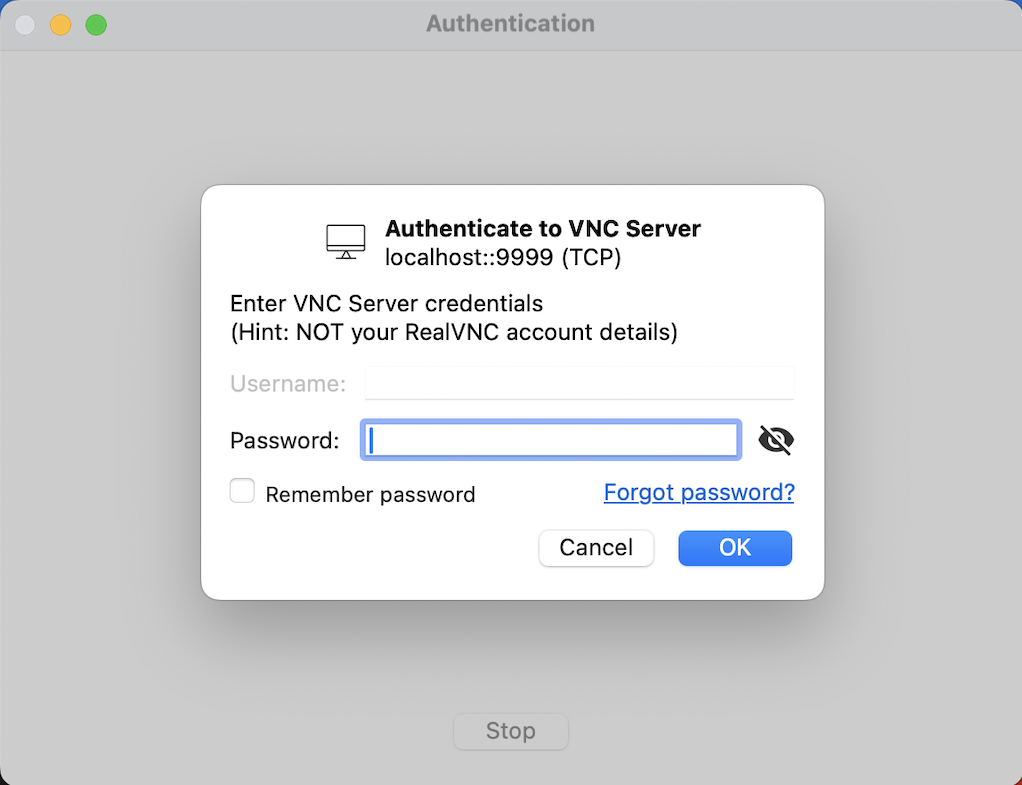
- Enter the Password you set initially
- Upon access, you may find the Color quality is low. Go to settings to adjust it
Click the > Options > Picture quality > Change to High > OK
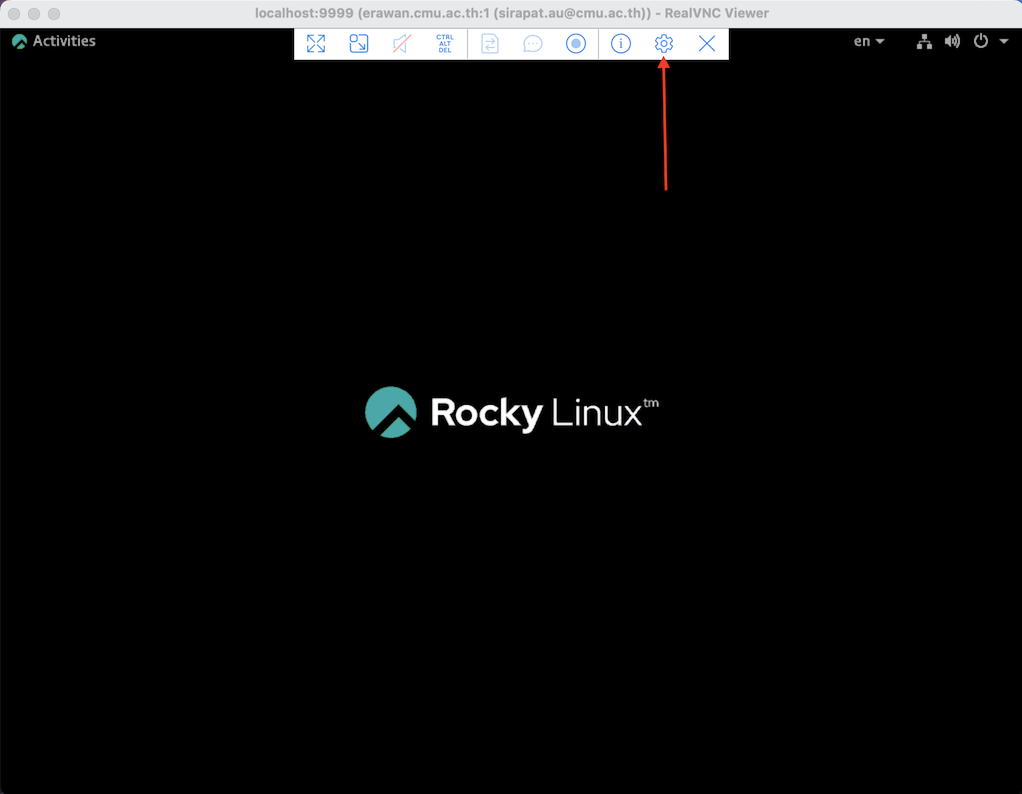
- Configure the session not to log off
If this setting is not applied, you will encounter a Lock Screen upon your next return.
Click the top right corner > Screwdriver icon as shown > Power > Black screen > Change to Never

¶ Method to Resolve User Logoff
If the setting in step 5 above was not applied,the machine will log off, making it unusable (stuck at the login screen).
- To resolve this, use the command
$ loginctl
- This command lists all logged-in sessions on the machine (the list may be long due to other users).
| SESSION | UID | USER | SEAT | TTY |
|---|---|---|---|---|
| 15333 | 1112 | aaa.b@cmu.ac.th | pts/28 | |
| 21637 | 1231 | xxx.y@cmu.ac.th | pts/56 | |
| ... | ... | ... | ... | |
| 534 | 1112 | aaa.b@cmu.ac.th | pts/6 |
- Locate your session (check the USER column).
- Use the command
loginctl unlock-session <SESSION NUMBER>
Example
$ loginctl unlock-session 15333
If you enter the command and still cannot use the session, try the next SESSION NUMBER associated with your user until the login screen disappears or you can interact with the desktop.